Flat Pattern Project
Creating a garment construction guide (AKA flat pattern) from a personal reference garment for future recreation.
Reference Garment
Why did I pick this garment?
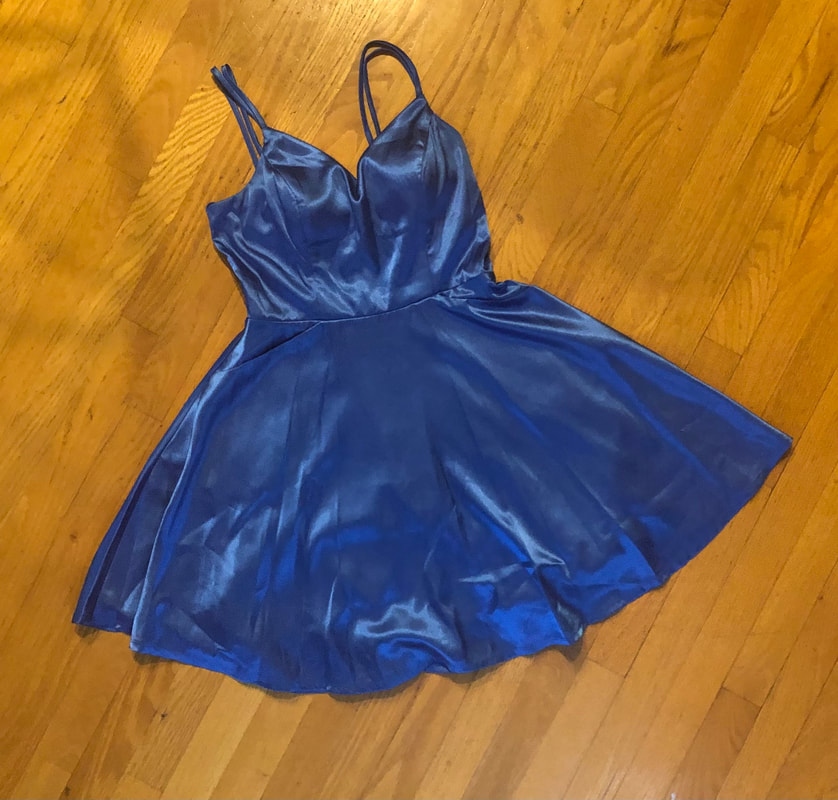
Because of its simple but appealing silhouette, I chose to create a paper pattern of this blue, satin spaghetti-strap dress. Multiple pattern pieces were able to be duplicated and flipped vertically to save time, and the creation of all the pattern pieces was challenging – but feasible. I admired the smooth, shiny appearance of this satin/polyester blend and its absence of harsh wrinkles, therefore if I were to recreate this dress, I would likely use the same type of fabric.
Special Characteristics
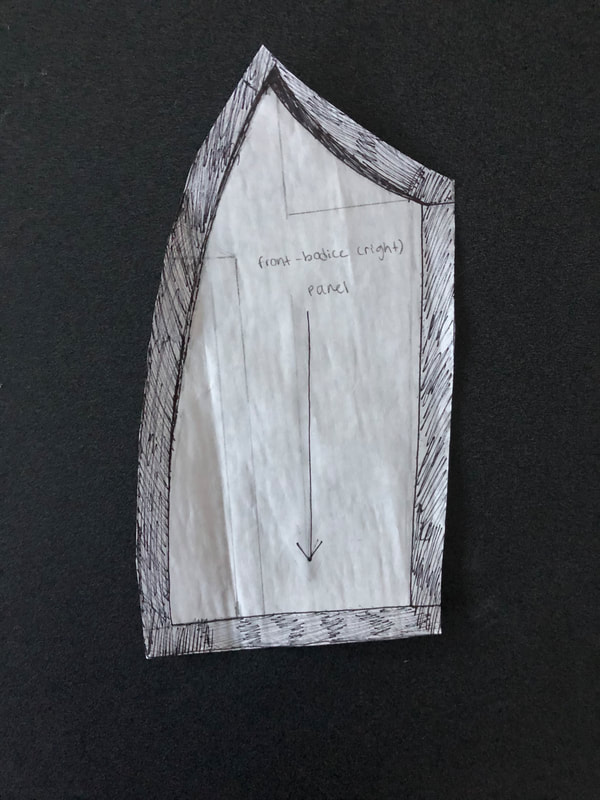
This garment consisted of a five-panel bodice with a v-neckline, a circle skirt, and spaghetti straps. Special notions required to recreate this garment include a zipper, lace, and cutlet (padding) inserts. Specific construction methods to achieve the desired look of the reference garment include inserting pockets – though this is optional and I did not include this in my pattern pieces.
The Process
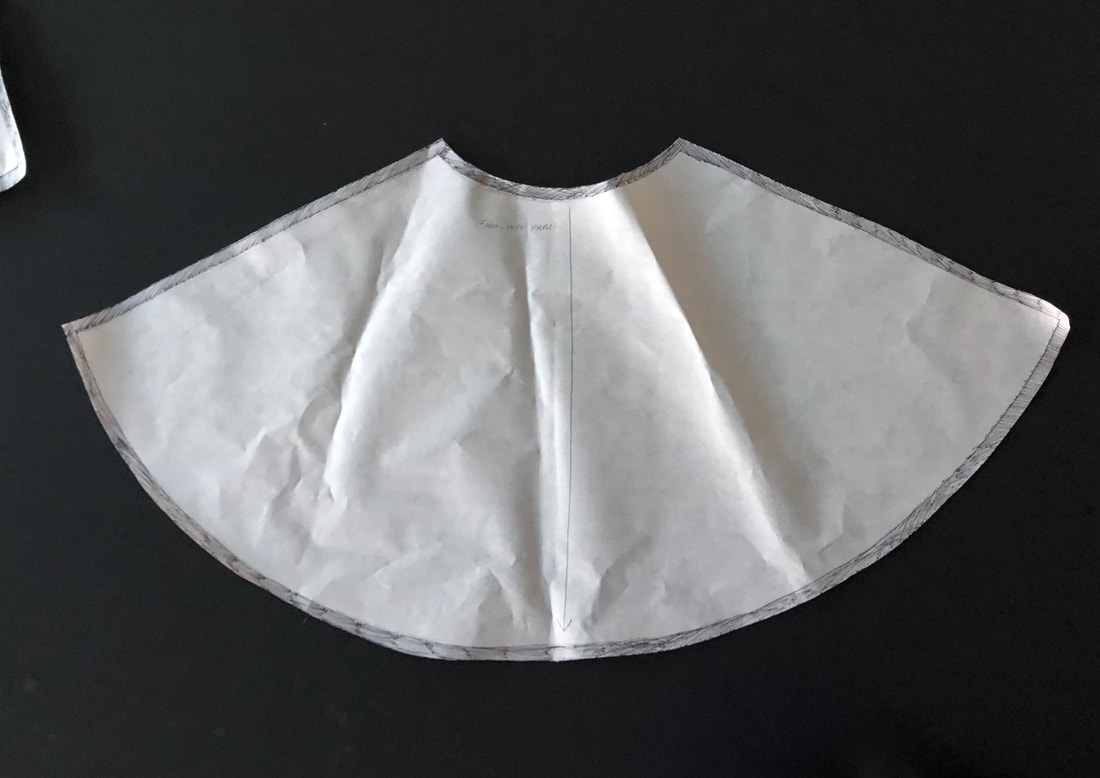
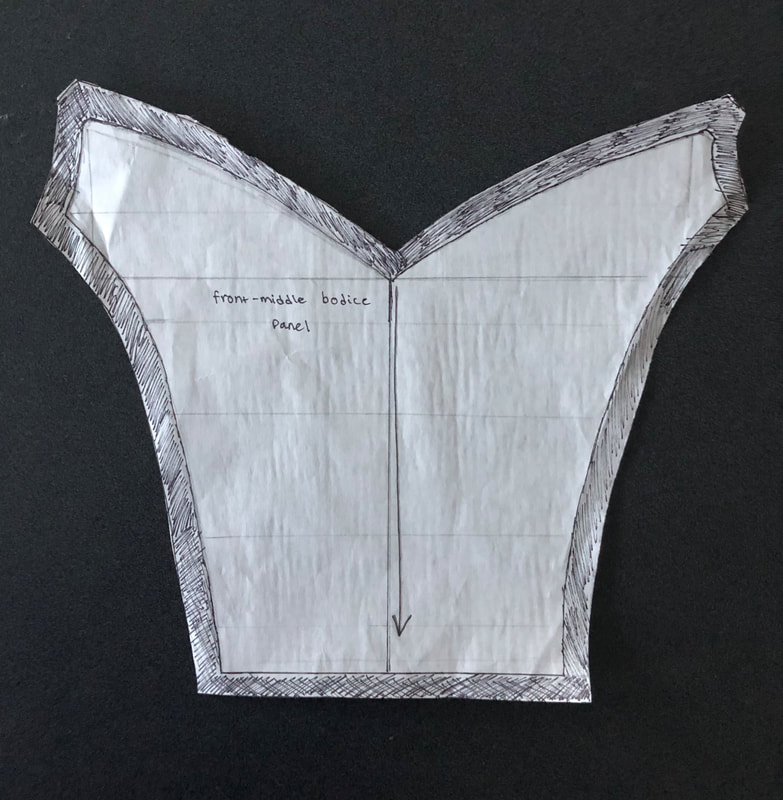
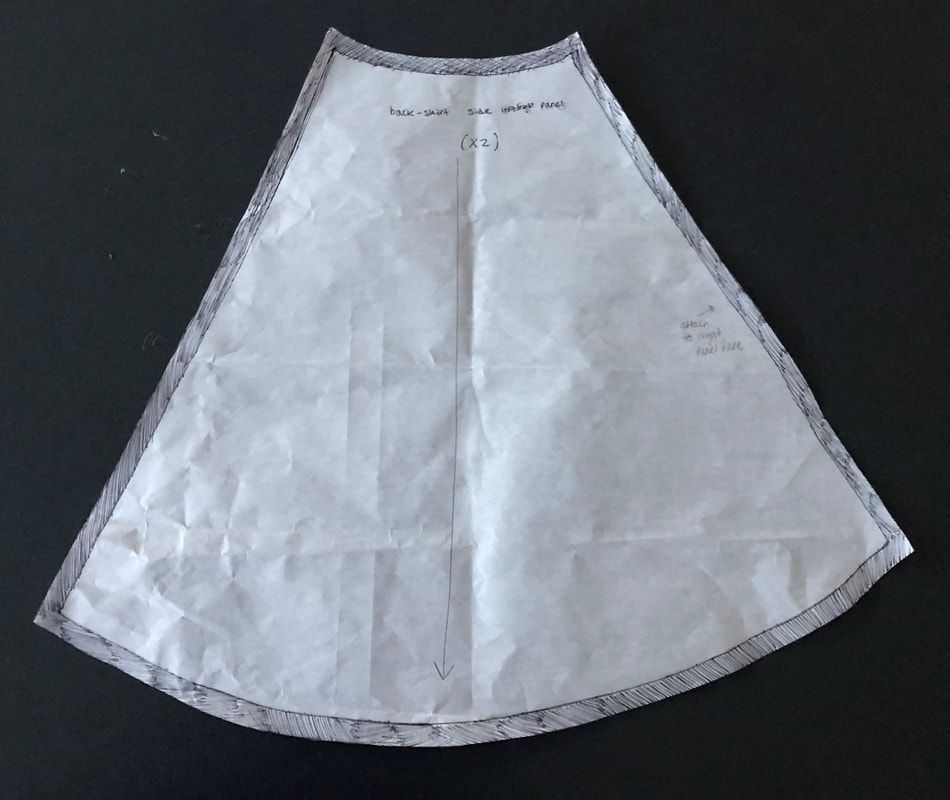
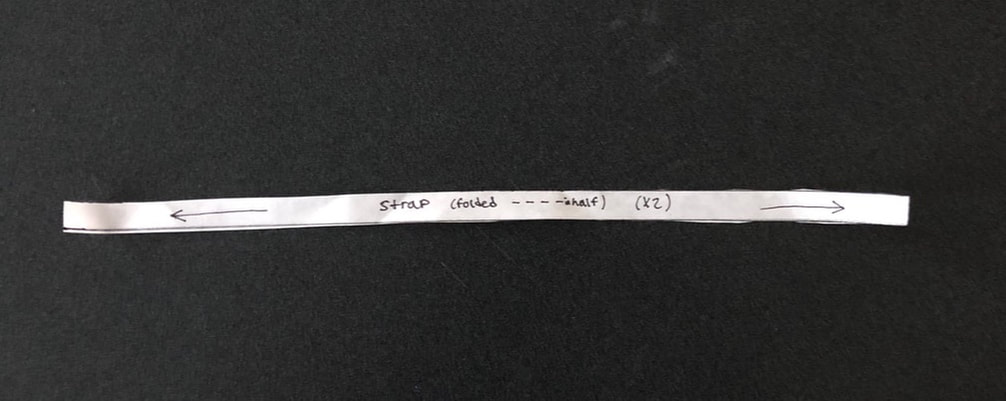
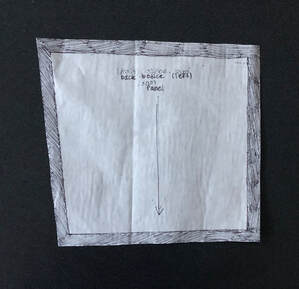
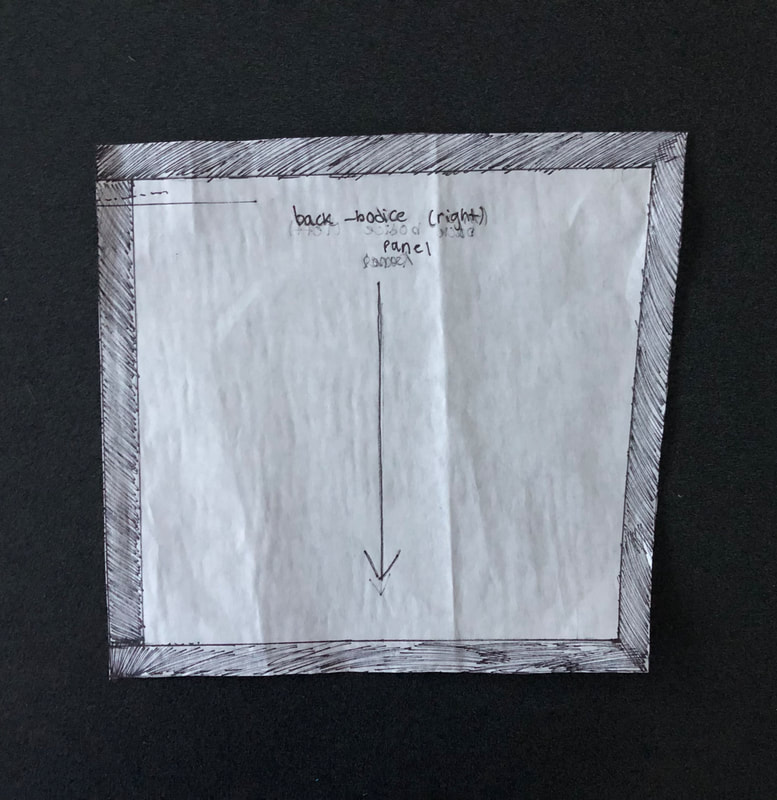
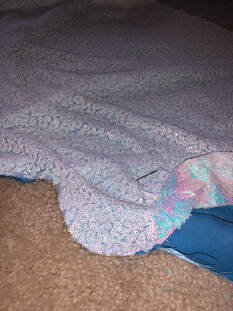
I began the process of creating my pattern pieces by laying my reference garment flat on the floor and measuring as many aspects of such as I could. I then drafted a 'blueprint' of each piece of the garment, making each vertical and horizontal dimension accurate relative to the aspect ratio of the actual pattern pieces. Once I had finalized all my measurements – labeled on a sketch of each pattern piece, I began tracing on pattern paper. Throughout my tracing, I would re-orient the way the garment laid on the floor to trace with the right measurements, checking my marks with a ruler as I continued. Next, I added a 5/8" seam allowance along the perimeter of each pattern piece before cutting each out. Some of the pattern pieces required to recreate this satin dress were simply duplicates of others, flipped across an axis, therefore I could designate on certain pieces to cut out two (X2) instead of one. Before turning in all of my pattern pieces, I labeled each and added the grainline.
Reflection
Throughout the process of constructing these pattern pieces, I felt that the most challenging task was correctly sketching the arc shape of the bottom of the skirt and top of the bodice as the instantaneous slope of these sketched lines does not remain constant, therefore many measurements must be taken to ensure accuracy of arcs' shapes. On the contrary, I felt that the easiest aspect of constructing these pattern pieces was simply adding the grainline to each finished piece, as it only required me to draw a line with an arrow pointing towards the floor to define the orientation of the pattern piece.
If I were to complete this project again, I would save myself time and hassle by taking more measurements in vertical length from the bottom of the skirt to the waistline at various horizontal points to increase my precision in sketching the shape of the circle skirt. Overall, I enjoyed this project as I enhanced my understanding of garment construction through the mode of 'thinking backward' as I inspected the construction someone else completed of a garment, attempting to fragment such into pattern pieces so that I may recreate such for personal use.
Because of its simple but appealing silhouette, I chose to create a paper pattern of this blue, satin spaghetti-strap dress. Multiple pattern pieces were able to be duplicated and flipped vertically to save time, and the creation of all the pattern pieces was challenging – but feasible. I admired the smooth, shiny appearance of this satin/polyester blend and its absence of harsh wrinkles, therefore if I were to recreate this dress, I would likely use the same type of fabric.
Special Characteristics
This garment consisted of a five-panel bodice with a v-neckline, a circle skirt, and spaghetti straps. Special notions required to recreate this garment include a zipper, lace, and cutlet (padding) inserts. Specific construction methods to achieve the desired look of the reference garment include inserting pockets – though this is optional and I did not include this in my pattern pieces.
The Process
I began the process of creating my pattern pieces by laying my reference garment flat on the floor and measuring as many aspects of such as I could. I then drafted a 'blueprint' of each piece of the garment, making each vertical and horizontal dimension accurate relative to the aspect ratio of the actual pattern pieces. Once I had finalized all my measurements – labeled on a sketch of each pattern piece, I began tracing on pattern paper. Throughout my tracing, I would re-orient the way the garment laid on the floor to trace with the right measurements, checking my marks with a ruler as I continued. Next, I added a 5/8" seam allowance along the perimeter of each pattern piece before cutting each out. Some of the pattern pieces required to recreate this satin dress were simply duplicates of others, flipped across an axis, therefore I could designate on certain pieces to cut out two (X2) instead of one. Before turning in all of my pattern pieces, I labeled each and added the grainline.
Reflection
Throughout the process of constructing these pattern pieces, I felt that the most challenging task was correctly sketching the arc shape of the bottom of the skirt and top of the bodice as the instantaneous slope of these sketched lines does not remain constant, therefore many measurements must be taken to ensure accuracy of arcs' shapes. On the contrary, I felt that the easiest aspect of constructing these pattern pieces was simply adding the grainline to each finished piece, as it only required me to draw a line with an arrow pointing towards the floor to define the orientation of the pattern piece.
If I were to complete this project again, I would save myself time and hassle by taking more measurements in vertical length from the bottom of the skirt to the waistline at various horizontal points to increase my precision in sketching the shape of the circle skirt. Overall, I enjoyed this project as I enhanced my understanding of garment construction through the mode of 'thinking backward' as I inspected the construction someone else completed of a garment, attempting to fragment such into pattern pieces so that I may recreate such for personal use.
Finished Pattern Pieces
|

Sketch and Measurements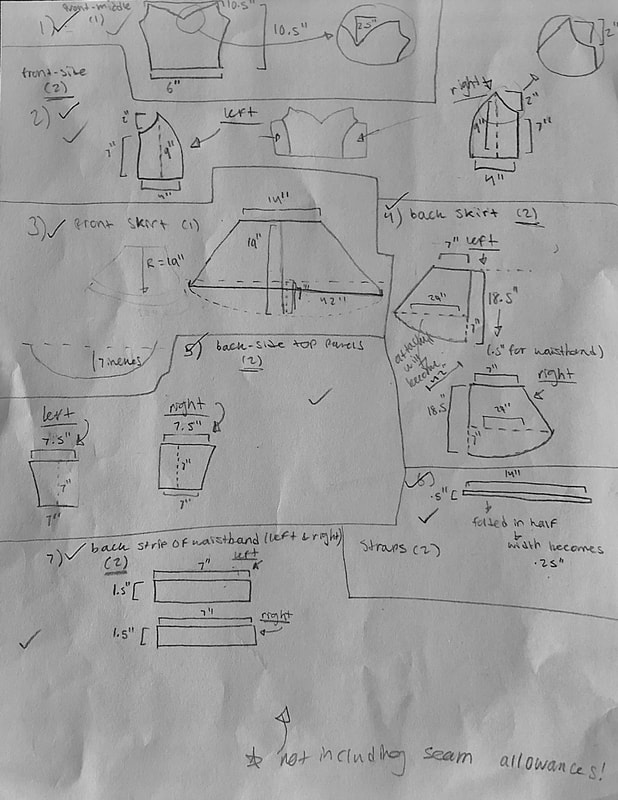
|

Unconventional Materials Project
Creating a complete outfit with unconventional materials that adheres to a unique, cohesive theme with an assigned group.
|

|
|
Materials Used
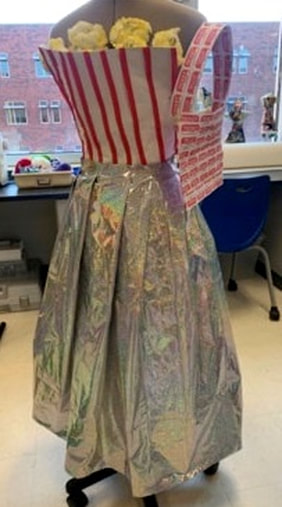
"Popcorn" - Yellow paint, water, and cotton balls
Popcorn Box Bodice - White tissue paper, red streamers, scissors, and hot glue
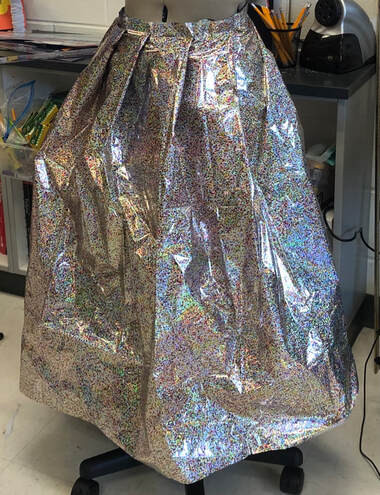
Skirt - Party tablecloth and clear tape (used to make pleats)
Ticket Purse - Paper admission tickets, muslin, staples, paper, scissors, and hot glue
Challenges and Feats
While creating this look, I feel that the most challenging component to construct was the purse as it required more work with hot glue and couldn't keep its form simply by using pins. Due to this, it was a hassle to make. My group had to first attempt the adhesion of the sides together by using staples, but I ended up going in with hot glue. I also had to rip apart the purse and re-build half of it to insert a bottom that would be more spacious and accentuate the look of a three-dimensional purse. On the contrary, I feel that it was quite easy to create the skirt as I only had to make folds along the waistline and then pin the table cloth around the dress form. Although I was sick and absent for two of our workdays, I managed to fix the issue we had with the purse and I created the skirt. If we'd had more time, I think it would have been nice for our group to touch up the edges of the bodice and add perhaps a belt or some other decals to the skirt to make the skirt appear more cohesive with the carnival theme.
"Popcorn" - Yellow paint, water, and cotton balls
Popcorn Box Bodice - White tissue paper, red streamers, scissors, and hot glue
Skirt - Party tablecloth and clear tape (used to make pleats)
Ticket Purse - Paper admission tickets, muslin, staples, paper, scissors, and hot glue
Challenges and Feats
While creating this look, I feel that the most challenging component to construct was the purse as it required more work with hot glue and couldn't keep its form simply by using pins. Due to this, it was a hassle to make. My group had to first attempt the adhesion of the sides together by using staples, but I ended up going in with hot glue. I also had to rip apart the purse and re-build half of it to insert a bottom that would be more spacious and accentuate the look of a three-dimensional purse. On the contrary, I feel that it was quite easy to create the skirt as I only had to make folds along the waistline and then pin the table cloth around the dress form. Although I was sick and absent for two of our workdays, I managed to fix the issue we had with the purse and I created the skirt. If we'd had more time, I think it would have been nice for our group to touch up the edges of the bodice and add perhaps a belt or some other decals to the skirt to make the skirt appear more cohesive with the carnival theme.
Self Directed Apparel Project: Ballgown Iridescence
Creating a garment of choice that meets at least three of the designated Q4 project requirements; documenting only the creation of the sequin bodice.
Finalized Garment
|
|
In-Progress Photos
|

|
|
|

|
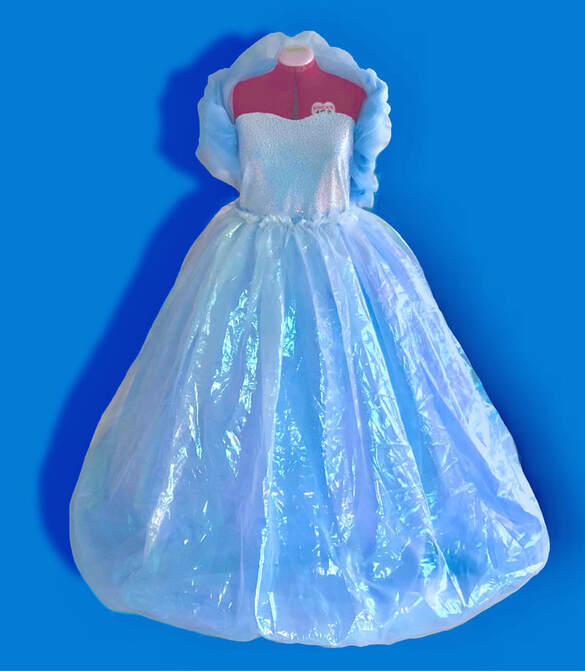
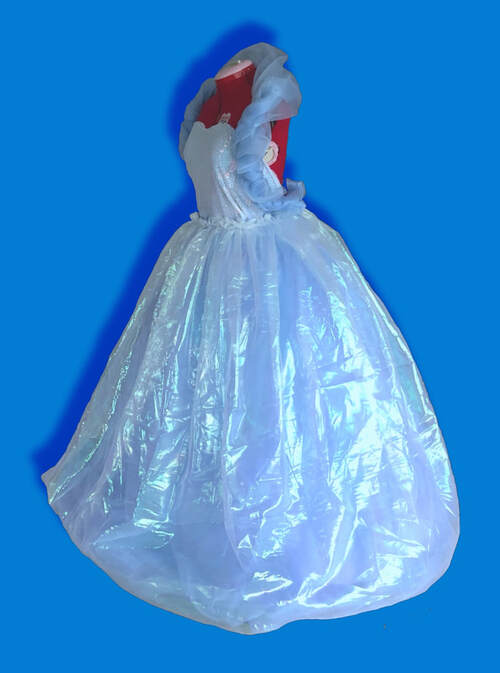
An Introduction
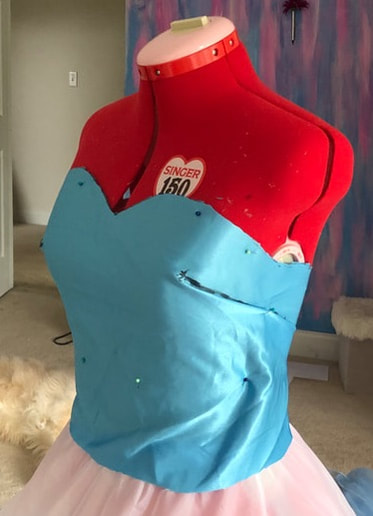
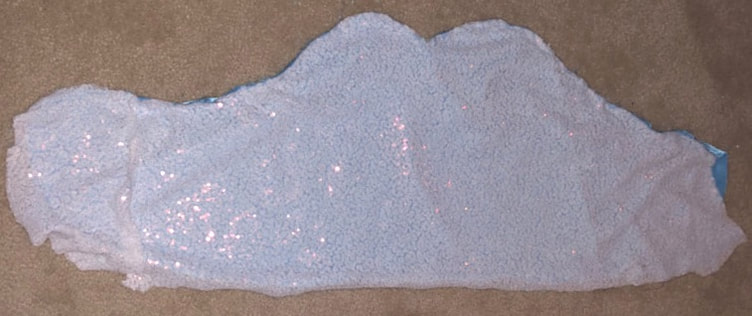
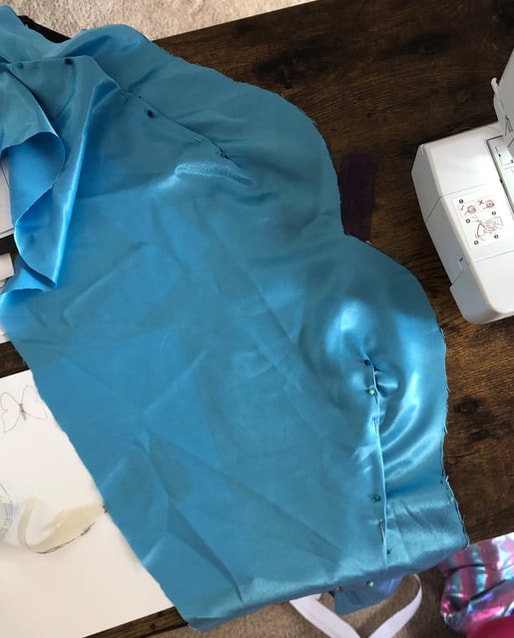
For my quarter-four independent project, I decided to construct a ballgown with a colorful, large organza skirt and an iridescent sequin bodice that features a sweetheart neckline. Although I created both the skirt and bodice, I am only focusing on the bodice regarding project requirements, my process, and reflections. To create this sequin bodice, I began by draping muslin fabric on a dress form and testing out different methods of adding shape (i.e. darts). I drafted a few paper patterns and followed them with this same muslin fabric, but I wasn't entirely satisfied with the look. I was considering purchasing an online sweetheart bodice pattern, but I was afraid it wouldn't arrive on time and the print-off patterns were inaccessible as my printer does not work at home. So, I decided to drape with muslin again and make a new 'prototype' bodice. I decided that simply putting two darts at both sides of the chest would give enough shape as the sequin fabric would stretch to the desired shape once attached and this bodice would ultimately be attached to the skirt.
Requirements Met
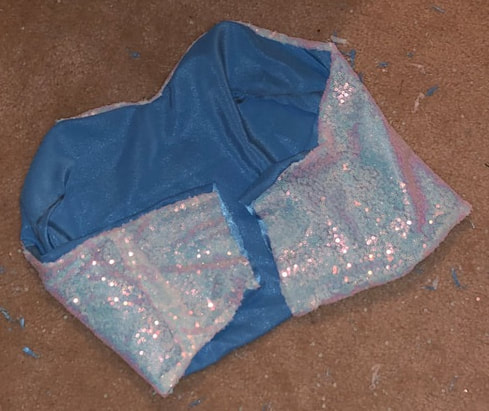
– Formal Fabric --> I used a blue, satin fabric and an iridescent sequin fabric to create the bodice of the dress
– Invisible Zipper --> I attached a zipper to the back of the bodice, sewing close to the slider of the zipper so that the zipper appears 'invisible'
– Darts --> As I began with the blue fabric to make the first layer of the bodice, I added darts to emphasize the look and fit I wanted
The Process
Throughout the process of constructing my ballgown's bodice, I felt that successfully attaching the zipper in the correct orientation was the most challenging task. Since the bodice consisted of two layers – one of satin and one of stretch, sequin fabric – it was challenging to align both layers correctly to make sure the length would look even at the back of the bodice on both sides of the zipper. On the contrary, I found it quite easy to hand-sew along the bottom and top of the bodice as I used a simple stitch method.
Reflection
Looking back at my journey throughout the creation of this bodice, I would have been interested in purchasing a pattern of a sweetheart bodice to test out and compare to my method, but I couldn't find one that was easily accessible under my time constraints and I didn't want to spend any more money. In the future, I'd like to re-do my 'mock' bodice and create a paper pattern for a sweetheart bodice that is accurate to my measurements. With a pattern, I would save time and fabric – and be able to make more garments with my leftover resources!
After completing the bodice, the most crucial lesson I've learned is to always use pins when you are contemplating doing so. Pins help keep things in place and are especially helpful when you are hand-sewing with smooth, slippery material.
For my quarter-four independent project, I decided to construct a ballgown with a colorful, large organza skirt and an iridescent sequin bodice that features a sweetheart neckline. Although I created both the skirt and bodice, I am only focusing on the bodice regarding project requirements, my process, and reflections. To create this sequin bodice, I began by draping muslin fabric on a dress form and testing out different methods of adding shape (i.e. darts). I drafted a few paper patterns and followed them with this same muslin fabric, but I wasn't entirely satisfied with the look. I was considering purchasing an online sweetheart bodice pattern, but I was afraid it wouldn't arrive on time and the print-off patterns were inaccessible as my printer does not work at home. So, I decided to drape with muslin again and make a new 'prototype' bodice. I decided that simply putting two darts at both sides of the chest would give enough shape as the sequin fabric would stretch to the desired shape once attached and this bodice would ultimately be attached to the skirt.
Requirements Met
– Formal Fabric --> I used a blue, satin fabric and an iridescent sequin fabric to create the bodice of the dress
– Invisible Zipper --> I attached a zipper to the back of the bodice, sewing close to the slider of the zipper so that the zipper appears 'invisible'
– Darts --> As I began with the blue fabric to make the first layer of the bodice, I added darts to emphasize the look and fit I wanted
The Process
Throughout the process of constructing my ballgown's bodice, I felt that successfully attaching the zipper in the correct orientation was the most challenging task. Since the bodice consisted of two layers – one of satin and one of stretch, sequin fabric – it was challenging to align both layers correctly to make sure the length would look even at the back of the bodice on both sides of the zipper. On the contrary, I found it quite easy to hand-sew along the bottom and top of the bodice as I used a simple stitch method.
Reflection
Looking back at my journey throughout the creation of this bodice, I would have been interested in purchasing a pattern of a sweetheart bodice to test out and compare to my method, but I couldn't find one that was easily accessible under my time constraints and I didn't want to spend any more money. In the future, I'd like to re-do my 'mock' bodice and create a paper pattern for a sweetheart bodice that is accurate to my measurements. With a pattern, I would save time and fabric – and be able to make more garments with my leftover resources!
After completing the bodice, the most crucial lesson I've learned is to always use pins when you are contemplating doing so. Pins help keep things in place and are especially helpful when you are hand-sewing with smooth, slippery material.
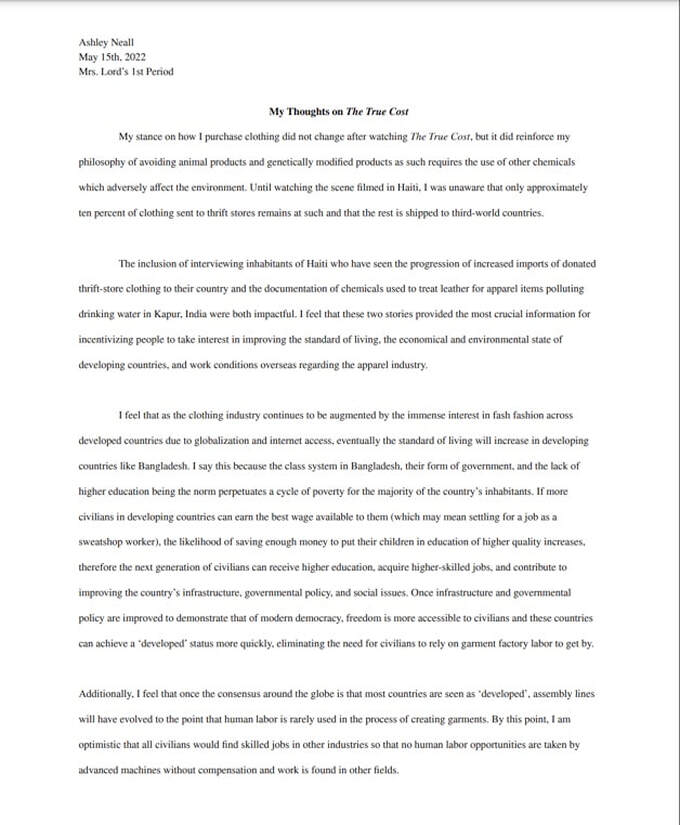
The True Cost - Reflection
Writing a short essay on my takeaways from the fast-fashion documentary: The True Cost.
Fashion Law Poster
Creating an informative poster that explains the governmental program that affects the regulation of garment production and marketing that I was assigned.